
Olivia Park
Bear
Brief user manual:
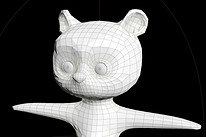
The purpose of this project was to create a bear character using a guide groom and hair gen, which would serve as the main elements for achieving a realistic and visually captivating depiction of the bear's fur.
-
Render Program: Redshift Average render time: 11min (per frame)
-
Resolution: 1280 x 720 Samples:Very High
-
Threshold: 0.001 Lights: RS Dome Light (HDRI), RSLight
Technical Guide


-
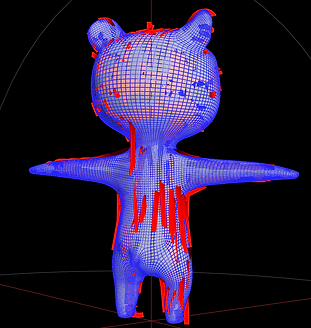
I utilized the delete node to separate the eyeballs from the bear's body, applying subdivision only to the body to ensure that the fur was generated solely on the skin's surface.
-
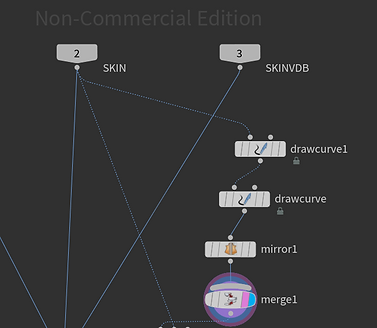
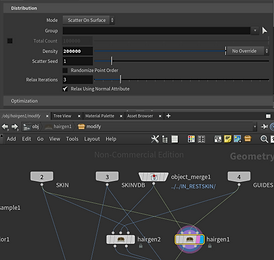
Then inside the guidegroom which involves inthe manipulation and control of guides that influence the behavior of hair in a simulation, I used curve advect. Curve advect can simulate the effect of wind, forces, or other external factors affecting the appearance and movement of hair or fur. Using drawcurve I draw the direction of the hair growth and mirror node helps it to draw the direction symmerticaly.


-
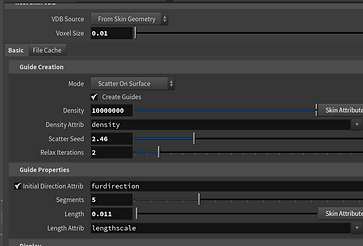
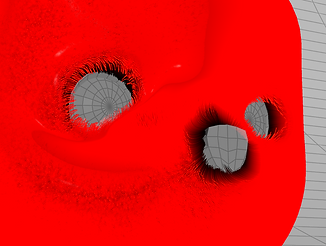
I adjusted the voxel size to be extremely small and increased the density parameter significantly to generate thick, dense fur on the bear. During the guiding process, I employed the frizz operation and aligned the direction to -1 along the z-axis, allowing the fur to naturally cascade downward, mimicking the distinctive texture of a bear's fur. This meticulous adjustment ensured that the fur appeared voluminous and lifelike, thereby enhancing the overall visual appeal of the bear model.


-
By utilizing the Hairgen node and Hair Clump, I established distinct groups within the fur simulation. By meticulously controlling parameters such as clump size, strength, and falloff, I intricately blended two distinct styles of fur to create a more authentic and lifelike appearance for the overall hair simulation.

-
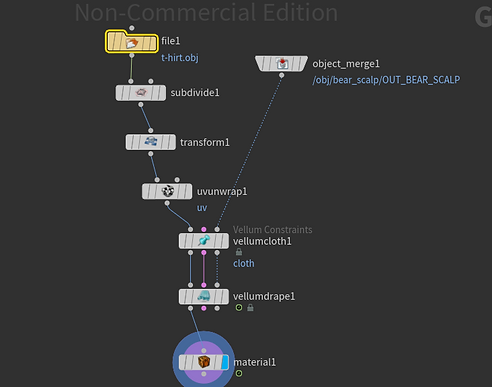
For the cloth of the bear I created in Maya and brought it to Houdini and gave vellum cloth which create realistic cloth simulations and connected to maerial node.